Install Ubuntu on Virtual Box
There are several ways to install Ubuntu we will follow virtual machine way.
Virtual machine (VM) is a program that runs on host machine (e.g. Your PC with windows) and simulates the environment for guest machine (Ubuntu).
First task is to install VM on windows, configure it and then install ubuntu on that VM.




Select RAM size.
Virtual machine (VM) is a program that runs on host machine (e.g. Your PC with windows) and simulates the environment for guest machine (Ubuntu).
First task is to install VM on windows, configure it and then install ubuntu on that VM.
1. Install Oracle VM VirtualBox on windows.
There are lots of VM players available we have selected most popular and free version i.e. Oracle VM VirtualBox.
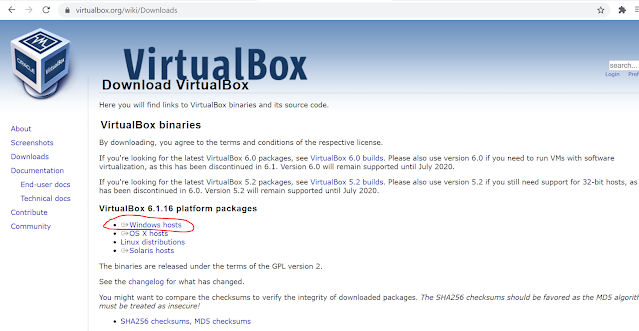
Download Oracle VM Virtual Box player for windows from official website.

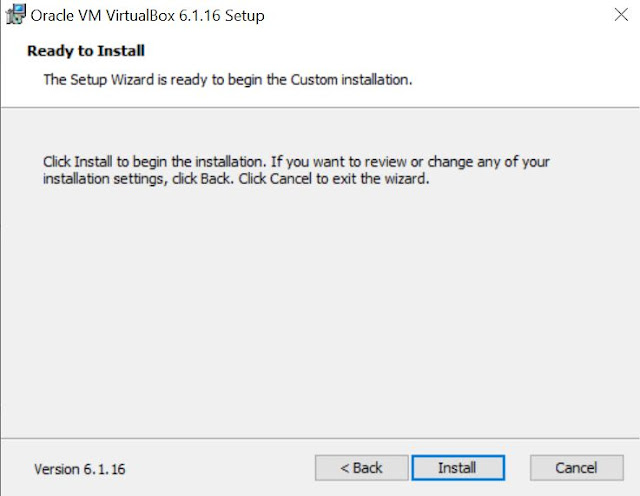
After downloading the application launch its setup by double clicking (e.g. VirtualBox-6.1.16-140961-Win.exe). Setup wizard will start then follow the instructions on the screen.


Finish the setup.
2. Configure Virtual Machine
Once the VM player is installed lets now configure the virtual machine for Ubuntu. Configuring is as good as customizing your new virtual machine. One can choose RAM memory to allocate, Hard disk to be assigned, CPU cores to be selected etc.
Following is the reference configuration you can alter as per your choice.
Launch Oracle VM VirtualBox. Select New option to create new VM for Ubuntu.

You can Name the VM machine as per your wish, Your Ubuntu OS will be stored at Machine Folder path, you may choose to browse for new location.
ISO Image is the OS bootable file which is used to install OS.
Download Ubuntu image file from official website of Ubuntu (Ubuntu website >> Download >> Ubuntu Desktop).
Always download stable version like LTS- Long term support.
Select Path of that ISO Image file where you have downloaded the Ubuntu OS bootable file.
Select Next.

Size should not be more than half of the memory of your host PC.


Since we have already provided Ubuntu bootable file (.iso) path in the beginning, CD drive of VM already has the Ubuntu OS setup loaded. We can directly Start OS by Pressing Start Button and wait for booting instructions.

Follow the steps to install Ubuntu.


Restart Ubuntu OS.

After Ubuntu is restarted enable copy paste between Host PC and Guest (Ubuntu) OS.

Now Shutdown the Ubuntu using VM ware options.

Relaunch the Ubuntu.

Ubuntu is now ready to use.
e.g. If your PC has 8 GB RAM then 4 GB RAM is recommended.
Select Processor Cores
Number should not be more than half of the Cores of your host PC Processor.
e.g. If your PC has 8 Cores then 2 to 4 Cores is recommended.
Select Next.

Select Hard Disk size.
10 to 25 GB hard disk space is enough.
Ensure you uncheck 'Pre-allocate Full Size' option otherwise it will take up entire allocated memory size from your host hard-disk.
Select Next.

View Summary of Virtual Machine. Click Finish.


3. Install Ubuntu


Once setup is complete restart the VM.


Congratulations !! Ubuntu is successfully installed.
4. Finishing touches
The Ubuntu Desktop screen is shown in a small window, in order to stretch it and view the desktop in full screen we need to install some essential drivers. It is called 'Guest Additions'. It has all other required things which smoothens the VM experience.
Devices >> Insert Guest Additions CD image
CD will be detected in Ubuntu. It should autorun. If it doesn't work open CD contents and right click autorun.sh to run as program.
It will install all necessary modules. Press Enter to close window.
After Ubuntu is restarted enable copy paste between Host PC and Guest (Ubuntu) OS.
Devices >> Shared Clipboard >> Bidirectional
Devices >> Drag and Drop >> Bidirectional
Now Shutdown the Ubuntu using VM ware options.
Machine >> ACPI Shutdown
Relaunch the Ubuntu.
Go to View >> Auto-resize Guest Display
Installing OpenCV on Rpi
Installation of Opencv 3.4.3 with Python on RPi 3 B+
We will be using Rpi 3 B+ as it has fastest CPU and more RAM which will be beneficial for OpenCV compilation which is very tedious and time consuming task.
We recommend to use Rpi 3 B+ with latest OS on atleast 16GB memory Card.
Before starting the compilation process we need to carry out some activities which will make our compilation process very smooth.
Heads up : This compilation requires around 3-4 hours (Rpi 3 B+ for lower Rpis its more than 9hrs).
Rpi won't die from overheating, but it will slow down its CPU performance, potentially increasing build time from 2 hours to 6 hours.
Expand your filesystem to include all available space on your micro-SD card.Type command:
A. Get more space on Memory card.
A.1: Expand File System
Expand your filesystem to include all available space on your micro-SD card.Type command:
sudo raspi-config
Select the “Advanced Options” menu item,Followed by selecting “Expand filesystem”.
Once prompted, you should select the first option, “A1. Expand File System”, hit Enter on your keyboard, arrow down to the “<Finish>” button, and then reboot your Pi — you may be prompted to reboot, but if you aren’t you can execute:
sudo reboot
After rebooting, your file system should have been expanded to include all available space on your micro-SD card. You can verify that the disk has been expanded by executing df -h
A.2: Remove unwanted stuffs
Delete both LibreOffice and Wolfram engine to free up some space on your Pi$ sudo apt-get purge wolfram-engine
$ sudo apt-get purge libreoffice*
$ sudo apt-get clean
$ sudo apt-get autoremove
After removing the Wolfram Engine and LibreOffice, you can reclaim almost 1GB!
B.Increase Virtual Memory Swap Space
B.1 Increase Swap Space to avoid Virtual memory error
Virtual memory exhausted: Cannot allocate memory
Type following command:
Type following command:
sudo nano /etc/dphys-swapfile
The default value in Raspbian is:
CONF_SWAPSIZE=100
We will need to change this to:
CONF_SWAPSIZE=1024
Exit from nano editor by pressing
Cntrl + X then y and Enter key
Then you will need to reboot:
sudo reboot
You can then verify the amount of memory + swap by issuing the following command:
free -m
The output should look like:
total used free shared buffers cached
Mem: 435 56 379 0 3 16
-/+ buffers/cache: 35 399
Swap: 1023 0 1023
Lets start compilation:
Step 1: Make sure your OS is current. (< 5min)
sudo apt-get update
sudo apt-get upgrade
Step 2: Install dependencies (< 10min)
sudo apt-get install build-essential cmake pkg-config
sudo apt-get install libjpeg-dev libtiff5-dev libjasper-dev libpng12-dev
sudo apt-get install libavcodec-dev libavformat-dev libswscale-dev libv4l-dev
sudo apt-get install libxvidcore-dev libx264-dev
sudo apt-get install libgtk2.0-dev libgtk-3-dev
sudo apt-get install libatlas-base-dev gfortran
Step 3: install Python 3 (< 2min)
We need this in order to enable Python bindings in Open CV:In OpenCV, all algorithms are implemented in C++. But these algorithms can be used from different languages like Python, Java etc. This is made possible by the bindings generators. These generators create a bridge between C++ and Python which enables users to call C++ functions from Python. To get a complete picture of what is happening in background, a good knowledge of Python/C API is required. A simple example on extending C++ functions to Python can be found in official Python documentation[1]. So extending all functions in OpenCV to Python by writing their wrapper functions manually is a time-consuming task. So OpenCV does it in a more intelligent way. OpenCV generates these wrapper functions automatically from the C++ headers using some Python scripts which are located in modules/python/src2
sudo apt-get install python3-dev
Step 4: Install pip3 (< 2min)
sudo apt-get install python3-pip
Step 5: Get the latest (3.4.3) OpenCV source code (< 5min)
I am using version 3.4.3 of OpenCV. You can check the Releases section of the official site (or Github) to see what the current build is. If your desired version is different, update the commands and paths below accordingly.Download and unzip OpenCV 3.4.3 and its experimental modules (those are stored in the opencv_contrib repository):
wget -O opencv.zip https://github.com/opencv/opencv/archive/3.4.3.zip

wget -O opencv_contrib.zip https://github.com/opencv/opencv_contrib/archive/3.4.3.zip

unzip opencv.zip

unzip opencv_contrib.zip
Step 6: Install Numpy, Scipy (< 3min)
sudo pip3 install numpy scipy
Step 7: Compile OpenCV (< 10min)
Note: this step will take a long time. Took almost 2 hours on my device. Also, your Raspberry Pi will overheat without proper cooling.
Again, I am using version 3.4.3 of OpenCV. If you aren't - update your paths accordingly:
cd ~/opencv-3.4.3/
mkdir build
cd build

cmake -D CMAKE_BUILD_TYPE=RELEASE \
    -D CMAKE_INSTALL_PREFIX=/usr/local \
    -D INSTALL_PYTHON_EXAMPLES=ON \
    -D OPENCV_EXTRA_MODULES_PATH=~/opencv_contrib-3.4.3/modules \
    -D BUILD_EXAMPLES=ON ..
Make sure cmake finishes without errors.
Step 8: build OpenCV (90-120min)
This will work faster if you use all four CPU cores:
make -j4
It reaches 100%, all samples will be compiled and it appears process is hanged in between as control is not returning to command terminal. Don't worry!!
Just check CPU usage using following command(use another putty session):
If all cores usage is not high (not near 100%) means compilation is complete. Wait for 10-15 min just to ensure we do not terminate any ongoing activity.
Then terminate the make -j4 process by pressing (in same terminal where you executed make -j4 and compilation is 100%)
Cntrl+C.
Once OpenCV builds successfully, continue the installation:
sudo make install
sudo ldconfig
sudo apt-get update
... then reboot the system - and you should be good to go!
sudo reboot
Step 9: Test your OpenCV installation (< 1min)
$ python3
Python 3.5.3 (default, September 5 2018, 14:11:04)
[GCC 6.3.0 20170124] on linux
Type "help", "copyright", "credits" or "license" for more information.
>>> import cv2
>>> cv2.__version__
'3.4.3'
>>>
Subscribe to:
Posts (Atom)